
How to stack gas fireplace logs?
Gas fireplaces are becoming increasingly popular due to their convenience, low maintenance, and efficient heating capabilities. However, arranging gas fireplace logs can be tricky for some homeowners, as it’s important to stack them in a way that is both aesthetically pleasing and allows for efficient gas combustion. In this article, we will discuss how to stack gas fireplace logs to create a realistic and efficient fire.
(Looking For “gas fireplace renovation“? Contact us today?)
Step 1: Check the Manual.
Before you start stacking the logs in your gas fireplace, you should read the manufacturer’s manual to ensure that you follow their recommended guidelines. Different brands and models of gas fireplaces may have specific requirements for log placement and size, which should be followed to ensure optimal performance and safety.
Step 2: Place the Base Logs.
The base logs are the largest logs in your gas fireplace and should be placed at the bottom. They should be positioned perpendicular to the burner, with the thickest part facing the back of the fireplace. If you have a grate, place the base logs on top of it. Make sure the logs are snug against each other and not too far apart, as this will create gaps that can cause the flame to go out.
Step 3: Arrange the Middle Logs.
The middle logs are smaller than the base logs and are placed on top of them. They should be placed at a slight angle, leaning against the back of the fireplace. This creates an opening in the front of the fireplace that allows air to flow through, fueling the flames. The middle logs should be arranged to mimic the natural shape of a burning log, with some crossing over each other and others resting on top of the base logs.
Step 4: Position the Top Logs.
The top logs are the smallest logs in your gas fireplace and should be placed on top of the middle logs. They should be arranged in a similar manner to the middle logs, with some leaning against the back of the fireplace and others crossing over each other. The top logs should be positioned close to the front of the fireplace to create the appearance of flames shooting out of the logs.
Step 5: Add Embers and Glowing Logs.
To create a realistic fire, you can add embers and glowing logs to your gas fireplace. Embers are small pieces of rock wool that are placed around the base of the logs, while glowing logs are designed to look like they are burning from the inside out. Both can be purchased from your local home improvement store or online retailer.
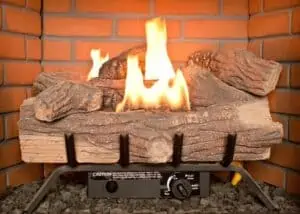
Step 6: Test the Flame.
Once you have arranged your gas fireplace logs, turn on the gas and test the flame. The flame should be blue and steady, without any yellow or orange tips. If the flame is not blue, this may indicate that there is a problem with the gas flow or log placement. In this case, you should turn off the gas and consult the manufacturer’s manual or a professional technician.
In conclusion, stacking gas fireplace logs is not difficult, but it does require some attention to detail. By following the steps outlined above, you can create a beautiful and efficient fire that will keep your home warm and cozy. Remember to read the manufacturer’s manual before starting and always exercise caution when working with gas appliances.