
What Are The Steps For Installing A Gas Fireplace Insert?
Installing a gas fireplace insert is a great way to add warmth and comfort to your home while also increasing energy efficiency. However, it can be a complex project and should only be attempted by those with experience in DIY projects or a professional installer. Here are the steps involved in installing a gas fireplace insert:
(Looking for “cost to repair gas fireplace“? Contact us today!)
-
Choose the right gas fireplace insert.
Before you start the installation process, you need to choose the right gas fireplace insert for your home. Factors to consider include the size of the insert, its heating capacity, and the type of fuel it uses (natural gas or propane). You should also consider the design and style of the insert to ensure it complements your home decor.
-
Prepare the existing fireplace.
The next step is to prepare the existing fireplace for the new insert. This will typically involve removing the existing damper and any other components that are not needed with the gas insert. You may also need to remove any masonry or other material that is in the way of the insert.
-
Install the gas line.
Once the existing fireplace is prepared, you will need to install a gas line to supply the new insert. This is a job that should be done by a licensed professional, as working with gas lines can be dangerous. The gas line will need to be connected to your home’s gas supply and run to the location of the new insert.
-
Install the venting system.
A gas fireplace insert requires a venting system to safely exhaust the combustion gases produced by the burner. This can be done by installing a flexible or rigid metal venting system that runs up through the chimney or out through a wall. The type of venting system you need will depend on the location of the insert and the design of your home.
-
Install the gas insert.
Once the gas line and venting system are in place, you can install the gas insert itself. This will typically involve placing the insert into the existing fireplace opening and securing it in place. You may also need to attach a decorative surround or trim to cover any gaps between the insert and the fireplace opening.
-
Test the gas insert.
After the insert is installed, you should test it to ensure that it is working properly. This may involve lighting the pilot light and turning on the burner to check the flame and heat output. You should also check for any gas leaks or other safety issues before using the insert regularly.
-
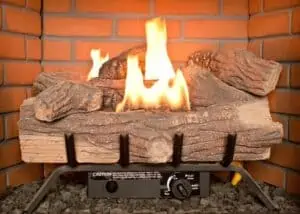
Finishing touches.
Once the gas insert is installed and tested, you can add some finishing touches to complete the installation. This might include painting the surround or adding decorative logs or stones to the insert. You should also consider adding a carbon monoxide detector near the fireplace to ensure that you and your family are safe from this dangerous gas.
In conclusion, installing a gas fireplace insert can be a complex project, but it is worth the effort for the comfort and energy savings it provides. By following these steps and seeking professional help when needed, you can safely and effectively install a gas insert in your home.